How to setup a console
Setting up a console is a relatively easy process, however some people can still get the basics wrong.So this blog post will hopefully serve to help you set up your Xbox 360 console.
Unboxing!
When unboxing the console it is always best to have the box on a flat surface with the front of the box (the side featuring an image of the console and the title in large letters) to be facing upwards, this is to prevent the console falling on the floor and smashing when you open it.
The flap of the box that opens is on the top of the box it will be stuck down with a sticker that is easy to tear (if not a pair of scissors should help!)
Once open you will see a bunch of leaflets and instruction manuals that detail technical specifics, promotions general information and disclaimers. Below this, if the main prize the Xbox 360 console, below this is all the wiring cables and a controller as well as any other adapters or parts that are needed. The general list of included components are; Xbox 360 console, AV cable*, Power supply, AC power cable, Wireless controller, 2x AA batteries, User manual & a wired headset*
"*" Item or number of items may vary by console package.
Plug Me In!
Once this is done you can then decide on a place to position your new console, it is recommended that you do not place the Xbox 360 in a confined space or next to a heat source and that is should be placed on a flat surface with plenty of circulation to the system. Once positioned remove any and all protective tape from the console and any of the wires, these are placed there only to prevent scratches on delicate or glossy surfaces as well as providing a barrier from dust keeping the machine clean.
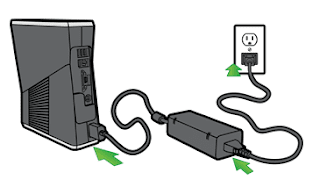 The next step is to connect the power cable (the one with the conversion box attached) and plug it into the console, then plug in the AC power cable to the adapter and AC plug socket, as there will be a live current ensure hands are dry to avoid shock.
Getting Connected
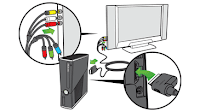
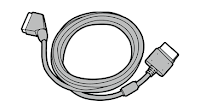 Most consoles will come with a composite AV (audio/video) cable and a SCART adapter to connect it to a display, this can be either a TV or monitor. however this cable does not support HDTV output. Firstly you connect the AV cables, 3 of the 6 on the cable if your using the original AV cable. 3 of these are for standard TV output (Yellow,White,Red) and 3 of these are for HD/AV output (Yellow,Green, Red) there is a switch on the cable which allows you to switch between AV and HD output, for standard UK TV's a SCART cable or adapter is required, fortunately one is included in all UK Xbox 360 bundles, all you have to do is connect the AV cables into the ports in thge adapter with the corresponding colours , flick the switch to AV and plug the SCART into the SCART port into the TV. alternatively if you have a HDMI cable you can plug it into the back of the Xbox in the HDMI port and a similar port on the HDTV and view in a resolution of 480p or higher. Then turn
Give Me Control!
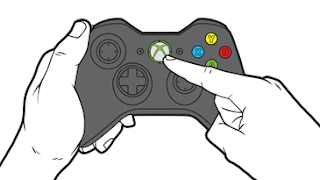 Connecting a controller is a simple process all you have to do is get your controller, put in the batteries, battery pack or connection cable. and turn it on pressing and holding the 360 button in the centre of the controller until it turns on.
On the console press the connect button this will cause the 4 lights around the power button to flash, this is to show that the console is searching for an active controller, then within 20 seconds do the same on the controller. Once the console has found and connected to the controller the lights will stop flashing and one of the lights will remain on signalling that there is an active controller connected, there is a capacity of up to 4 controllers, the same number of lights this light is reflective as the position or player the controller is assigned to, there are corresponding lights on the controllers that do the same thing.
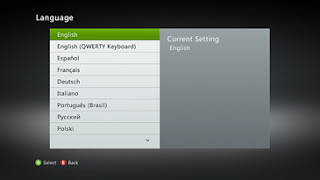
Setup
These have simple onscreen instructions you need to follow in order to finish the setup, once complete you are can begin gaming, just insert a disk and be on your way!


No comments:
Post a Comment